
To prepare walls for painting like a professional, clean the walls, repair any holes and cracks, sand rough spots smooth, protect your floors and trim, and prime any patched or stained areas before you paint. Proper prep is what makes paint adhere well and last for years, and it’s the single biggest factor in a professional-looking finish.
Ask any homeowner what makes a great paint job and they’ll say the color, or the brand of paint, or how many coats went on. Ask a professional and you’ll get a different answer every time. It’s the prep. What happens before the first drop of color touches the wall is what separates a finish that looks flawless for years from one that peels and shows every flaw by next winter.
After 10 years and more than 1,000 projects around the Salt Lake City area, I can tell you that my crew spends more time prepping than actually painting on most jobs. That’s not us being slow. That’s the job being done right. So here’s exactly how professionals prepare walls for painting, step by step, so you can either do it properly yourself or know what to look for when you hire someone.
Step 1: Clear and Protect the Room
Before we touch a wall, we set the room up. That means moving furniture to the center or out entirely, taking down wall plates and hardware, and covering floors and anything that stays with drop cloths.
Homeowners tend to rush this part, and it’s a mistake. A few minutes of taping off trim and laying down protection saves you an hour of scrubbing paint off your baseboards and floors later. We tape edges cleanly and cover everything, because a professional finish isn’t just the wall, it’s the fact that nothing else in the room got touched.
Step 2: Clean the Walls
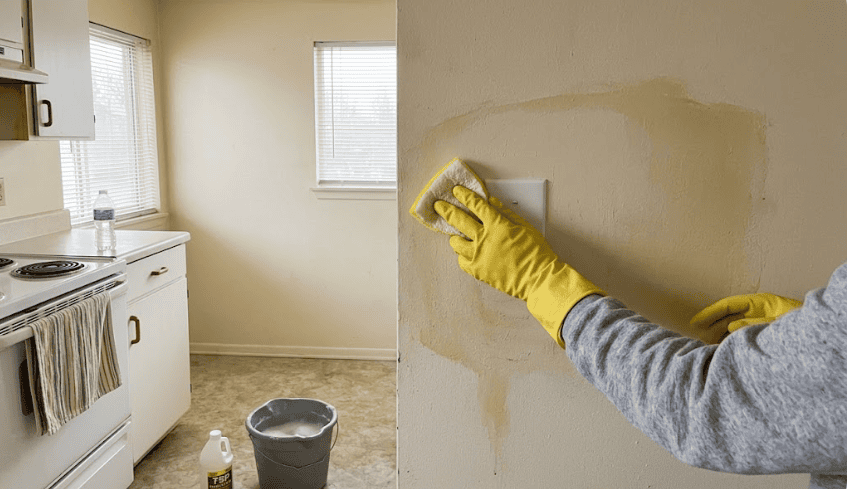
This is the step almost everyone skips, and it’s a big one. Walls collect dust, grease, and grime, especially in kitchens and high-traffic hallways. Paint does not stick to a dirty wall. It sticks to the dirt, and then peels off with it.
We wash the walls down and let them dry fully. In kitchens or around cooking areas, we use a degreaser to cut through the film that builds up over years. It’s an unglamorous step, but skip it and even the best paint won’t grip properly.
Step 3: Repair Holes, Cracks, and Dents
Now the walls get fixed. Every nail hole, crack, dent, and gap gets filled. Small holes get spackle, bigger damage gets patched, and cracks along corners or seams get addressed so they don’t telegraph through the new paint.
Here in Utah, seasonal temperature swings cause a lot of hairline cracking and nail pops, so this step matters more than people expect. Filling properly and letting it cure before moving on is what keeps those flaws from showing up again a month after you paint.
Step 4: Sand Everything Smooth
Once repairs are dry, we sand. This does two things. It knocks down the patched spots so they’re flush with the wall, and it scuffs any glossy or previously painted surfaces so the new coat has something to grip.
You can’t feel it with your eyes, but you can feel it with your hand. A properly sanded wall is smooth and slightly dulled, which is exactly what fresh paint needs to bond. Skip the sanding on a glossy wall and you’re setting up the new coat to fail.
Step 5: Wipe Down the Dust
Sanding creates fine dust, and that dust will ruin a finish if it gets sealed under the paint. So after sanding we wipe everything down again to get the walls clean and dust-free.
It feels repetitive, cleaning twice, but this second pass is what gives you that smooth, gritty-free final coat. Little things like this are the difference between a wall that looks hand-finished and one that looks fuzzy up close.
Step 6: Prime Where It Counts
Not every wall needs a full prime coat, but the right spots always do. We prime over patches and repairs, over stains like water marks that would bleed through, and over any big color change or bare surface.
Primer seals the surface, blocks stains, and gives the topcoat a consistent base so the color goes on even. Painting a patched wall without spot-priming is a classic reason you see those dull, flat patches showing through a finished coat. Prime right and the whole wall reads as one clean surface.
Why Prep Is Worth the Extra Time
I know prep is the boring part. Nobody gets excited about washing walls and sanding patches. But this is genuinely where a paint job is won or lost.
A gorgeous color over bad prep still looks like a bad paint job, and worse, it fails early. All the money you spent on quality paint is wasted if it’s sitting on a dirty or glossy surface it can’t grip. When homeowners tell me their last paint job peeled or looked patchy within a year, it’s almost never the paint. It’s the prep that never happened.
See How We Do It
If you want to see the kind of finish proper prep produces, my crew and I post a lot of our recent work on Facebook and Instagram. It’s the easiest way to see the difference between a rushed job and one that was prepped the right way.
Frequently Asked Questions
Do I really need to clean walls before painting? Yes, and it’s the step most people skip. Paint bonds to the surface it touches, so if that surface is dusty or greasy, the paint grips the grime instead of the wall and peels early. A quick wash and full dry makes a real difference in how long your finish lasts.
Do you have to sand walls before painting? You should sand any patched areas and any glossy or previously painted surfaces. Sanding smooths repairs flush and scuffs slick surfaces so the new paint has something to grip. Flat, undamaged walls in good shape may only need a light pass, but glossy walls always need it.
Should I prime walls before painting? Prime the spots that need it: patches and repairs, stains that could bleed through, big color changes, and bare surfaces. You don’t always need to prime an entire wall, but skipping primer on patched or stained areas is a common reason those spots show through the finished coat.
How long does prep take compared to painting? On most jobs, prep takes as long or longer than the actual painting. That surprises people, but it’s normal for professional work. The time spent cleaning, repairing, sanding, and priming is exactly what produces a finish that looks smooth and lasts.
What happens if you skip wall prep? You get paint that peels, patches that show through, and a finish that looks rough up close and fails early. Skipping prep is the number one reason a paint job disappoints, and no quality of paint can make up for it.
Want the Job Done Right the First Time?
If reading all that made you realize prep is more work than you want to take on, that’s exactly what we’re here for. At SwiftHand Painting we treat prep as the most important part of the job, because it is, and it’s why our finishes hold up in Utah homes year after year.
Give me a call or text at (801) 699-5202 for a free walkthrough and quote, or send us a message on Facebook. Let’s get your walls done properly, from the prep up.
Spencer Heyward, SwiftHand Painting